

Building a divided egg-crate tray
Difficulty: easy. Time: 10 minutes design, 30 minutes making. Best method: laser-cut plywood.
A divided tray is the fastest way to tame a drawer full of odds and ends. This generator builds a shallow finger-jointed box and drops in a set of dividers that cross-lap into each other, egg-crate style: the row dividers are notched from the top, the column dividers from the bottom, and they slide together into a self-supporting grid that drops into the tray. Set the columns and rows and the whole layout falls into place. The Assembled 3D tab shows the grid seated so you can size each cell before cutting.
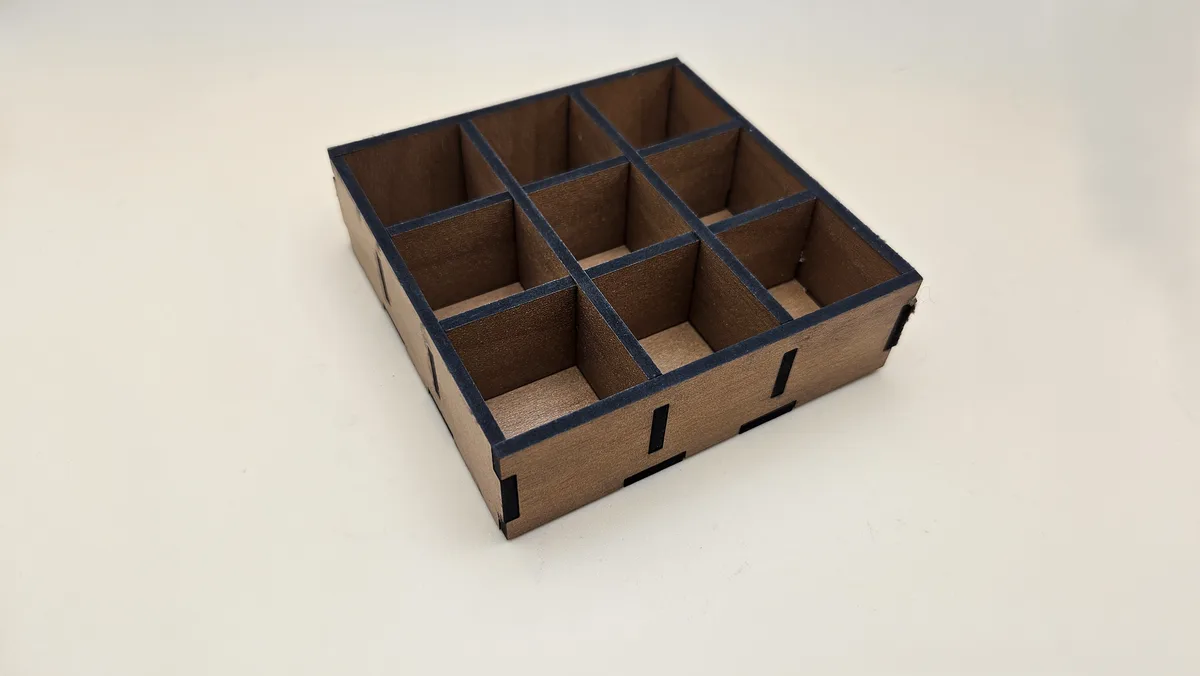
What You'll Need
- Laser cutting: 3 to 6 mm plywood or MDF. Measure the actual sheet thickness with calipers before you set the tool.
- 3D printing: any rigid filament. 3 to 5 mm panels give the cross-lap notches enough meat to hold.
- Glue: PVA wood glue for the tray body, plus clamps or elastic bands.
- Finishing: light sandpaper for the joint tabs and notch edges.
Step 1 - Tray size
Width, Depth and Height are outside dimensions, so subtract two thicknesses to get the interior the dividers fill. Keep the height low, this is a tray, not a box. Thickness must match your sheet because every finger joint and cross-lap notch is derived from it.
Step 2 - The grid
- Columns sets how many cells wide the grid is. Column dividers run front to back and notch in from the bottom.
- Rows sets how many cells deep the grid is. Row dividers run side to side and notch in from the top.
- Finger width controls the joint tab size on the tray walls. It does not change the cross-lap notches, which are always one thickness wide.
Step 3 - Check the assembly
Switch to the Assembled 3D tab and confirm the cells are the size you need before you commit. Wide, few cells suit tools and cables; a fine grid suits beads, screws, and hardware. The flat SVG view shows the tray panels and every divider laid out for cutting.
Choose Your Build Method
Before you cut
- Measure your sheet with calipers and set Thickness to what you measured. The cross-lap notches are exactly one thickness wide, so a wrong value makes them too loose or too tight.
- Run a test on one row divider and one column divider first, and check the notches slide together with light pressure before cutting the set.
- Cut the interior notches and slots before the outlines where your software lets you, so parts do not shift once free.
Assemble
- Glue the four tray walls into a ring and check for square, then drop the floor in.
- Slide the row and column dividers together at their notches to form the grid off the tray first.
- Lower the finished grid into the tray. It usually holds by friction, so leave the dividers unglued if you want to rearrange later.
Make It Yours
- Set columns and rows to 1 for a plain shallow tray with no dividers.
- Engrave labels on the tray floor under each cell before cutting.
- Cut the dividers from a contrasting material so the grid stands out against the tray.
Keep up with MyLaserTools.
Email me about new tools, product updates, tutorials, and occasional MyLaserTools offers. Unsubscribe at any time.
© 2026 MyLaserTools.com. All rights reserved.