

Building a finger-jointed display case with viewing windows
Difficulty: medium. Time: 10 minutes design, 45 minutes making. Best method: laser-cut plywood, or 3D printed panels.
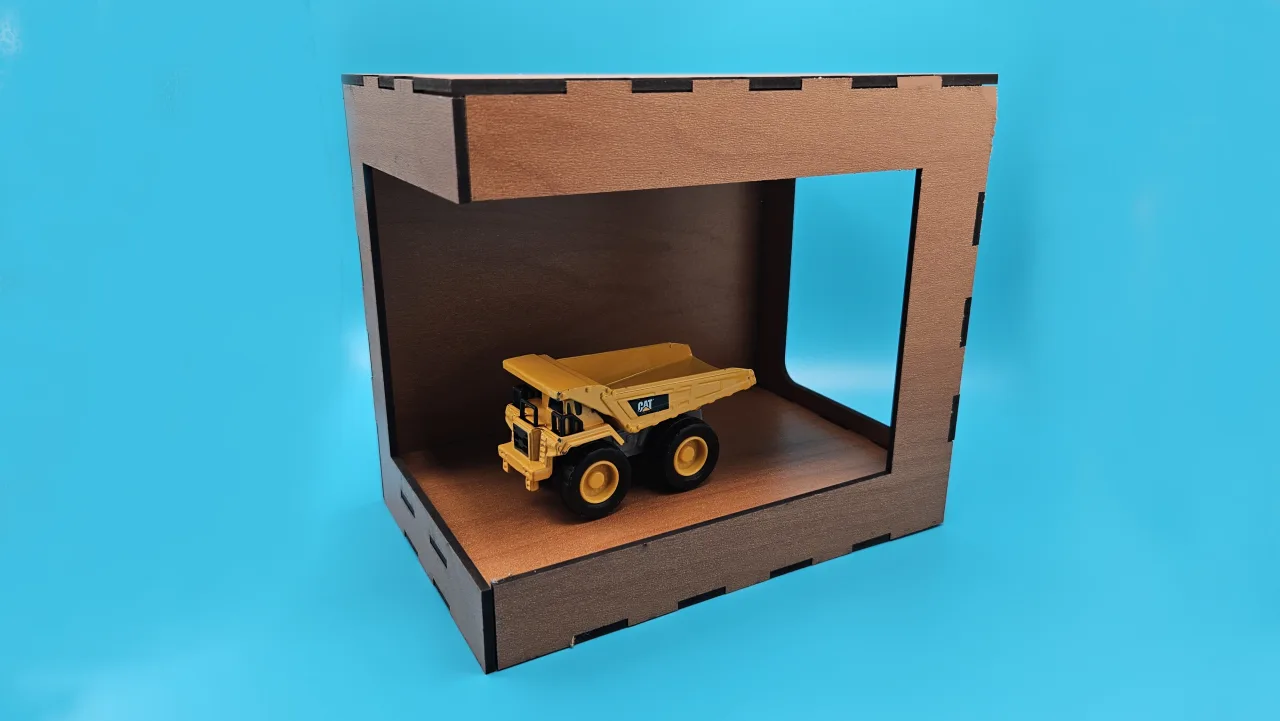
A display case is a finger-jointed box that has to stay square while showing what is inside it. This generator cuts the joints for you, drops rounded windows into whichever panels you pick, and can slot in an interior shelf. Open a corner and the window runs straight through it, so there is no vertical post between the front and that side wall. The Assembled 3D tab shows the panels in place, so you can check proportions and window size before spending a sheet.
What You'll Need
- Laser cutting: 3 to 6 mm plywood or MDF. Measure your actual sheet thickness with calipers, it is rarely exactly 3 mm.
- 3D printing: any rigid filament. PLA and PETG both work, and 4 to 6 mm panels print stronger joints than laser-thin ones.
- Glue: PVA wood glue for plywood, or plastic cement or CA glue for printed panels, plus a couple of clamps or elastic bands
- Optional: clear acrylic offcuts to glaze the windows
Step 1 - Case size
Width, Height and Depth are outside dimensions, so subtract two material thicknesses to get the usable interior. Thickness must match your sheet, because the finger joints and slot depths are all derived from it. A 0.2 mm error here is the difference between a press fit and a rattle.
Step 2 - Joints and options
- Finger width sets the joint pitch. 15 to 20 mm looks right on a case this size; smaller fingers look busy and add cutting time.
- Closed top adds a lid panel jointed into the walls. Leave it off for an open-top display.
- Window panels takes any combination of front, back, left, right and top. The bottom always stays solid so the case has a floor.
- Window size is the share of the panel the opening fills, inside a frame that always clears the finger joints.
- Open corners runs the window through the left or right corner. The front panel becomes a bracket, that corner loses its joints, and the floor, lid and back still hold the case square.
- Interior shelf cuts tabs on the shelf and matching slots in the left, right and back walls, sitting just below the window opening so it never crosses the glass line.
- Interior shelf adds a shelf panel cut to the inside dimensions. It is a drop-in shelf, so glue small cleats or cut slots if you want it fixed.
Step 3 - Check the assembly
Switch to the Assembled 3D tab and orbit the case. This is the panel layout as it will be glued up, so it is the fastest way to catch a window that sits too low or a case that is deeper than you meant. The Export Preview tab shows the flat sheet with each panel in its own colour.
Choose Your Build Method
Before you cut
- Measure your sheet with calipers and set Thickness to what you measured, not what the label says. Every finger joint, shelf tab and shelf slot is derived from it.
- Check the Export Preview tab and count the panels: four walls, a bottom, plus a top and a shelf if you enabled them. The shelf slot rows should appear on the left, right and back walls only.
- Run a joint test first if this is a new sheet. Cut one wall and the bottom, dry fit them, and only commit the rest once the tabs seat with light hand pressure.
Cut settings
- Each panel is a separate colour in the export so you can order the cuts, but a single pass at your normal settings cuts the whole sheet.
- Cut the windows and shelf slots before the outlines where your software lets you choose, so panels do not shift once they are free.
- Kerf makes finger joints slightly loose. If your machine cuts wide, add your kerf to the thickness value rather than scaling the file, so only the joints change and the outside size stays put.
- Mask the good face or drop the power on a final light pass to keep scorching off the window frames, which are the parts people actually look at.
Glue up
- Dry fit everything first. Finger joints in charred ply need a light sanding on the tabs, not force.
- Glue the four walls into a ring and check for square with a set square before the glue grabs. An open corner has no joint holding it, so clamp across the case rather than relying on that corner.
- Drop the bottom in, then feed the shelf tabs into the wall slots. The shelf has to go in before the top panel, since it will not fit afterwards.
- Add the top last. Glaze the windows from the inside with thin acrylic and a bead of clear glue around the edge, and leave the case clamped until the glue is fully cured.
Make It Yours
- Cut the back panel from mirror acrylic so a model is visible from both sides.
- Add a second shelf by cutting the shelf panel twice and gluing cleats at two heights.
- Engrave a label plate and glue it under the front window.
Keep up with MyLaserTools.
Email me about new tools, product updates, tutorials, and occasional MyLaserTools offers. Unsubscribe at any time.
© 2026 MyLaserTools.com. All rights reserved.