

Building a finger-jointed hobby case
Difficulty: easy. Time: 15 minutes design, 45 minutes making. Best method: laser-cut plywood.
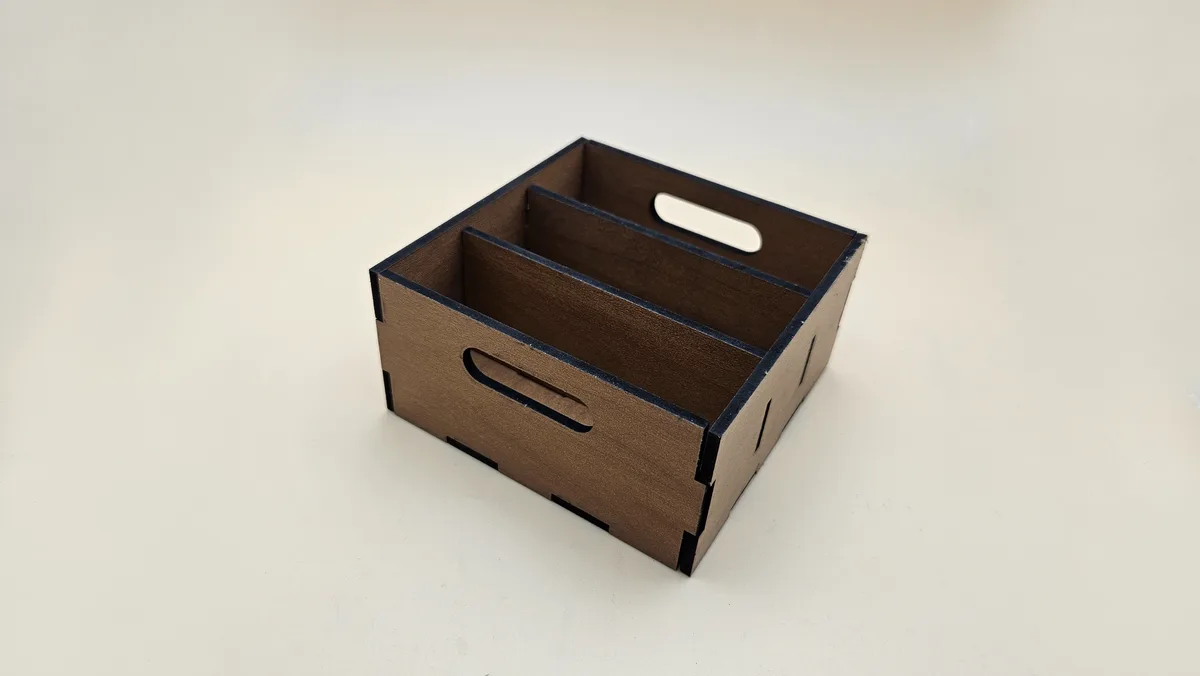
A hobby case is a crate with a lid and a job: keep paints, screws, or craft parts sorted and portable. This generator cuts every finger joint from your material thickness, slots a set of dividers into the floor to split the case across its width, and can drop a press-fit lid on top and a hand hole in each end wall so the whole thing lifts like a real tool tote. The Assembled 3D tab shows the panels in place so you can check the size before spending a sheet.
What You'll Need
- Laser cutting: 3 to 8 mm plywood or MDF. Measure the actual sheet thickness with calipers, it is rarely exactly what the label says.
- 3D printing: any rigid filament. 4 to 6 mm panels print stronger joints than laser-thin ones.
- Glue: PVA wood glue for the walls and floor, plus a couple of clamps or elastic bands.
- Finishing: light sandpaper to clean the tabs before assembly.
Step 1 - Case size
Width, Depth and Height are outside dimensions, so subtract two material thicknesses to get the usable interior. Thickness must match your sheet exactly, because every finger joint and floor slot is derived from it.
Step 2 - Compartments, lid and handles
- Compartments sets how many sections the case is split into. The dividers slot into the floor across the width, so a value of 3 means two dividers.
- Finger width controls how wide each joint tab is. Smaller tabs look finer but take longer to cut.
- Press-fit lid adds a removable top that friction-fits into the walls. Turn it off for an open tote.
- Carry handles cut a rounded hand hole near the top of each end wall.
Step 3 - Check the assembly
Switch to the Assembled 3D tab and orbit the case to confirm the dividers land where you want them and the height suits the parts you plan to store. The flat SVG view shows every panel and divider laid out for cutting.
Choose Your Build Method
Before you cut
- Measure your sheet with calipers and set Thickness to what you measured, not what the label says.
- Run a joint test first: cut one wall, the floor, and a divider, then dry fit them before committing the whole sheet.
- Cut the handle holes and floor slots before the outlines where your software lets you, so panels do not shift once they are free.
Glue up
- Dry fit everything first. Finger joints in charred ply need a light sanding on the tabs, not force.
- Glue the four walls into a ring and check for square before the glue grabs, then drop the floor in and slot the dividers.
- Leave the lid unglued so it stays removable, and clamp the body until the glue is cured.
Make It Yours
- Engrave a label on each compartment before cutting so the sections stay sorted.
- Turn off the lid and handles for a shallow open desk caddy.
- Raise the height and drop the compartment count for a deep single-bay tool box.
Keep up with MyLaserTools.
Email me about new tools, product updates, tutorials, and occasional MyLaserTools offers. Unsubscribe at any time.
© 2026 MyLaserTools.com. All rights reserved.