

Making a circuit wall plaque with the Race Track preset
Difficulty: Beginner–Intermediate · Time: 30–60 minutes · Methods, ranked: 1) Layered laser build - track cut from black acrylic, mounted on a red backplate with the access roads scored (the intended build), 2) single-piece engrave on painted or two-color stock, 3) full-color UV print or high-res PNG print for posters and phone-grip discs.
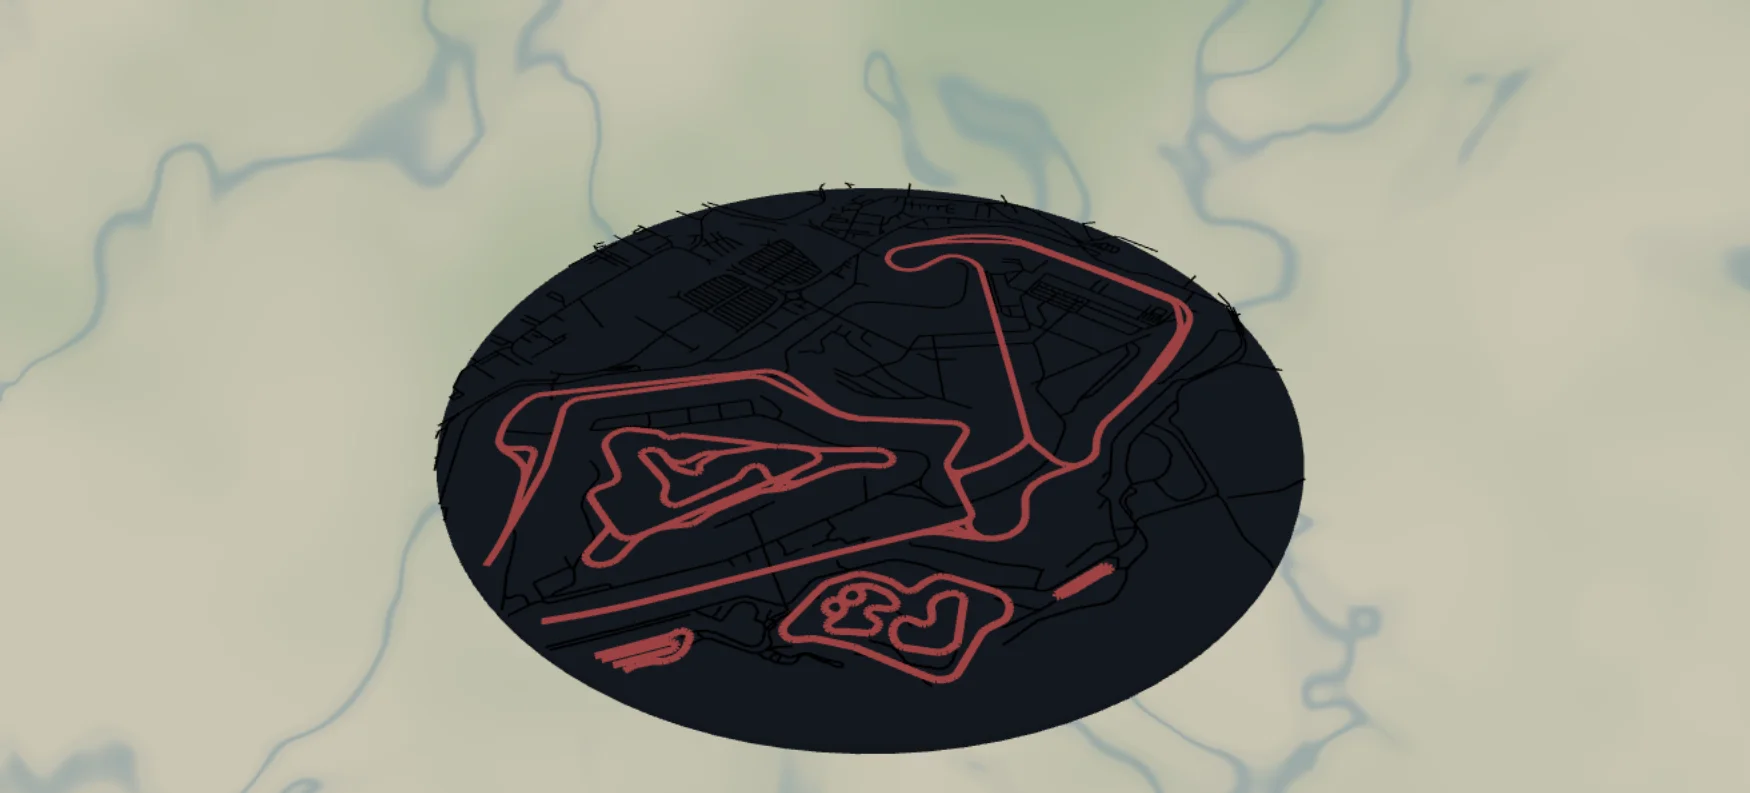
Every motorsport fan knows their circuit by silhouette alone. This preset isolates the racetrack itself - the actual raceway geometry from the map data - as a bold black ribbon over a racing-red round backplate, with the surrounding access roads as fine supporting detail. It ships set up on Silverstone and works for any circuit on the map: F1, MotoGP, your local kart track. The result is a layered plaque for the garage, office, or sim-racing rig.
What You'll Need
Layered laser build (recommended)
- Backplate: 3 mm red acrylic (gloss "racing red" cast acrylic - the preset's
#C0181F) or red-painted MDF, circle ~200–300 mm - Track layer: 3 mm black acrylic (matte black over gloss red is chef's kiss)
- Laser cutter, acrylic adhesive (Weld-On, or clear silicone for forgiving positioning), keyhole hanger or stand
Single-piece engrave
- Two-color acrylic (red cap / black or white core) or painted plywood
Step 1 - Start from the preset
Open the Race Track preset. It loads on Silverstone Circuit at zoom 14.2 in a circle frame with a black border ring. Search for any other circuit - Spa, Suzuka, Monza, Laguna Seca, or the local kart track all resolve from the raceway map data.
Framing tips:
- Zoom so the full circuit fits inside the circle with breathing room - 13.8–14.5 covers most grand prix tracks; small karting circuits may need 15+.
- Rotate your mental composition around the track's iconic corner - put Eau Rouge or the Suzuka esses where the eye lands first.
- Some venues have multiple layouts (historic + modern); zoom in to check which raceway segments are present before committing.
Step 2 - Tune the layers
Three layer groups:
Track - Solid mode, a single feature: raceway at width 6, black. Because it's a solid line feature with width > 0, it exports as a real filled ribbon - a continuous closed loop you can physically cut. Width 6 is right for a 250 mm plaque; go 8 for chunkier or for small kart tracks that need visual weight. The global border (black ring, padding 10) also applies to this layer, giving the cut layer a matching outer ring.
Access roads - Score mode (line mode): secondary, street, minor, and "other" roads, black. These are the paddock lanes, service roads, and pit access that give the plaque its sense of place. Important: in Score mode the laser scores each road as a single thin centerline in one pass - this is engraving detail, not cuttable geometry. In the layered build these scored lines land on the red backplate, not on the cut track. If you want a cleaner, logo-like plaque, hide this group entirely.
Backplate - a solid racing-red (#C0181F) disc behind everything. It's the physical bottom layer in laser builds and the background color in prints.
Step 3 - Export
In the export modal:
- Layered build: use the per-layer toggles. Export the Track layer SVG (your black cut file - ribbon + border ring), then the Access roads SVG (score/engrave file for the backplate - thin centerlines, not fills), then the backplate is just a plain circle at final size.
- Single-piece engrave: export the combined SVG or high-res PNG with everything visible.
- Print: high-res PNG (4096 px), Background toggle on so the red disc prints.
- Hanger hole if you want to hang it by a cord instead of a keyhole hanger - position top-center; it cuts through the backplate ring.
- Small-polygon cleanup on, mostly to tidy the access-road fragments.
Choose Your Build Method
Layered laser build
- Cut the backplate circle from red acrylic at final size (250 mm is a strong wall size). Score the Access roads lines onto it in the same job so registration is perfect.
- Cut the Track layer from black acrylic: the circuit ribbon and the outer border ring. Cut slowly - the ribbon has tight corner radii at chicanes.
- De-mask both parts. Dry-fit the ribbon over the scored backplate - the scored service roads should kiss the edges of the black track exactly.
- Glue: tiny dots of adhesive on the back of the ribbon at the straights (never at thin corner sections - squeeze-out shows), position using the scored access roads as the registration map, then the border ring last. 3M tape 467 or 468 transfer tape is a zero-squeeze-out alternative for acrylic-on-acrylic.
- Add a keyhole hanger or easel stand.
Single-piece engrave
- On red/black two-color acrylic: raster-engrave the Track and Access roads through the red cap - the circuit appears in the core color. One material, zero assembly.
- Or on painted MDF: spray red, engrave through to bare board, cut the circle.
Make It Yours
- Engrave the circuit name, country, and lap record along the inside of the border ring.
- Start/finish detail: add a small white-filled rectangle decal or paint marker dash at the start line.
- Sector colors: cut the track ribbon in three pieces from three acrylic colors (purple/green/yellow - sim racers will get it).
- Home-circuit pairing: this preset for the track, the City Map preset for the host town, hung side by side.
- Driver tribute: backplate in the driver's livery color instead of red - papaya, rosso, silver.
- Mini key fobs: 50 mm version with just the Track layer and a hanger hole, finished with snap clips - batch a whole season calendar of circuits.
- Swap the circle for the hexagon export shape and build a wall of hex plaques, one per circuit visited.
New free tools, every month.
New laser cutting tools, what's coming next, and features we're building right now. Only MyLaserTools.com news. No spam, ever.
© 2026 MyLaserTools.com. All rights reserved.