

Designing a stitchable frame with the Cross Stitch Frame Generator
Difficulty: easy. Time: 10 minutes design, an evening to stitch. Best method: 3D printing, or laser cutting acrylic and plywood.
This tool makes a rigid, reusable alternative to Aida cloth and plastic canvas: a frame with a perfect grid of stitch holes printed or cut straight into it. Pick a shape (rounded rectangle, circle, oval, arch, or scalloped), set the size and Frame Border Width, then choose a fabric count - the holes-per-inch value, just like Aida - and whether the holes are round or square. The grid fills the inner window automatically, and the Hole Size slider tunes how much material sits between holes so your needle passes cleanly. Turn on the Raised Frame to lift the border around the grid, shown as a second colour in the 3D preview and on the 2D design, and add a hanger hole to hang the finished piece.
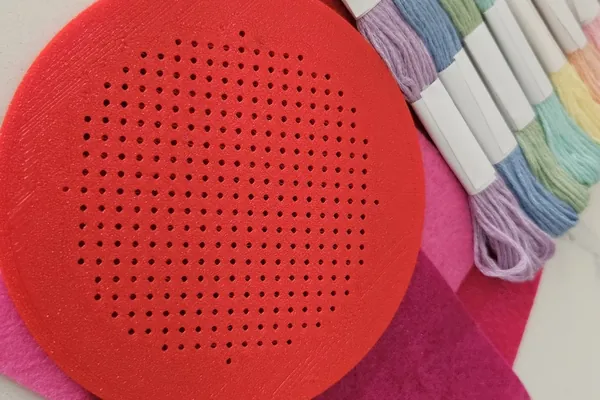
What You'll Need
- Material: PLA or PETG for 3D printing; 3 mm acrylic or plywood for laser cutting
- Printer or laser: any FDM or resin printer, or any diode or CO2 laser
- Stitching: embroidery floss and a tapestry needle that fits your chosen hole size
Step 1 - Shape, size, and border
Choose the frame shape and set the width, height, and Frame Border Width - the solid band around the stitch grid. Rounded and arch shapes add a Corner Radius slider; scalloped adds a Scallop Count.
Step 2 - The stitch grid
- Pick a Fabric Count - higher counts pack more, finer holes into the window for detailed patterns.
- Choose round or square holes to match the look you want and your needle.
- Adjust Hole Size so there is enough material between holes for the needle to pass without tearing.
- Turn on the Raised Frame to lift the border into a frame, and add a hanger hole if you want to hang the piece.
Step 3 - Export
Export STL / 3MF for 3D printing - the STL welds the frame and grid into one solid piece, while the 3MF keeps the base plate and raised frame as two coloured parts matching the preview. Or download the SVG for laser cutting: cut the outline and every stitch hole, with the frame engraved.
Choose Your Build Method
Printing the frame
- Print flat on the bed - the hole grid needs no supports.
- A 0.2 mm layer height keeps every stitch hole open; check the first layer so no holes bridge closed.
- Use the 3MF on a multi-material printer to print the raised frame in a contrasting colour to the grid.
- Two or three perimeters keep the thin webbing between holes strong enough to stitch against.
Make It Yours
- Stitch a monogram or tiny motif in the grid and hang it as an ornament.
- Print the frame in a colour that frames your thread palette - dark frames make pastels pop.
- Use square holes for a bold, blocky cross-stitch look and round holes for a softer one.
- Make a matching set of shapes - a circle, an arch, and a scalloped one - for a gallery wall.
- Size a large arch frame for a sampler, or a mini circle for a keychain charm.
- Turn off the raised frame for a flat coaster-style piece you stitch edge to edge.
New free tools, every month.
New laser cutting tools, what's coming next, and features we're building right now. Only MyLaserTools.com news. No spam, ever.
© 2026 MyLaserTools.com. All rights reserved.