Making scenic layered words with Layered Lettering
Difficulty: intermediate. Time: 15 minutes of design, 45 to 90 minutes of cutting and assembly. Method: laser cutting.
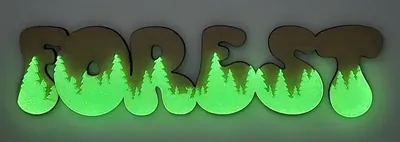
Layered Lettering turns a word into a diorama: type a name, pick a theme, and the tool composes a scene (Forest, City, Mushroom, or Sea) inside and behind the letterforms. The export is a layer-coded SVG, so you cut each layer from a different sheet and stack them into a dimensional sign.
It is built for laser cutting; the magic is in the physical depth between layers, with the scene peeking through and around the letters. Wood tones sell the forest, blues sell the sea, and painted layers turn the city skyline into wall art.
What You'll Need
- Laser cutting: laser cutter, two to four sheets of 3 mm laser-grade plywood in contrasting tones (or acrylic for a glossy version), wood glue or 3M tape for assembly
Step 1 - Type your word and pick a theme
Open the tool, enter your word in Your Text, and choose a theme: Forest, City, Mushroom, or Sea. Pick a Font with generous interior space; the scene needs room to live inside the letters. Short words (3 to 8 letters) compose best.
Step 2 - Size it
Set Text Width to your finished size using the Units toggle. Go big: layered scenes read best at 250 mm and up, where the trees, buildings, and waves keep visible detail after cutting. The preview shows the layers in their assembly colors.
Step 3 - Export
Download the SVG. Each layer arrives in its own color, so your laser software can separate them by color into individual cut jobs, one per sheet.
Choose Your Build Method
Cutting and stacking
- Import the SVG and split the layers by color; assign each to its own sheet and cut job.
- Choose materials per layer: light wood for the front letters, mid and dark tones for the scene layers behind, or paint each layer before assembly.
- Cut all layers masked; the scene layers have fine details like branches and rooftops that stain easily.
- Dry-stack the layers to confirm alignment before any glue touches wood.
- Bond with thin wood glue or 3M 467 tape; tape gives instant, squeeze-out-free bonds on flat layers.
- Optional: insert 2 to 3 mm spacers between layers for deeper shadows, then frame or stand the finished piece.
Make It Yours
- Forest theme with a family surname for cabin and cottage decor.
- Sea theme with a beach-house name or a favourite lake's name.
- City theme with your hometown name, painted in sunset gradient layers.
- Mushroom theme for a cottagecore nursery name sign.
- Cut the back layer from mirrored acrylic so light glints through the scene.
- Paint layers in a child's room palette before stacking for custom kids' decor.
- Make a matching pair: same theme, two names, for a couple's gift.
- Backlight the stack with an LED strip behind the deepest layer for a shadow-box glow.
New free tools, every month.
New laser cutting tools, what's coming next, and features we're building right now. Only MyLaserTools.com news. No spam, ever.
© 2026 MyLaserTools.com. All rights reserved.