Cutting an oversized city map on a small laser with the Laser Cut Split preset
Difficulty: Easy. Time: an evening. Best methods, in order: laser cutting, print.
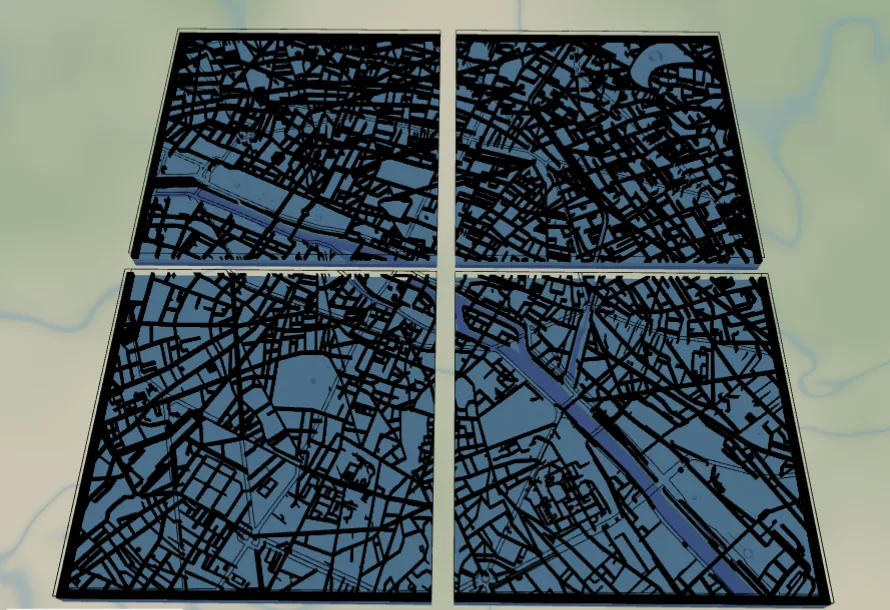
Most lasers can't fit an A1 sheet. This preset solves that: it sizes the map to A1 (594 x 841 mm) and splits it into four A3 tiles that butt-join into the full map. Because every tile is sliced from one source, the streets line up exactly across the seams. Center it on any city, then export the tiles as a ZIP.
What You'll Need
Laser cutting
- Four A3 sheets of your material (3 mm laser-grade plywood or acrylic), plus a backing board to mount the assembled tiles
- An A3-bed laser cutter
- Glue or mounting tape, and a flat surface to assemble on
- A3 printer or print shop, and the per-tile PNG/SVG ZIP from export
Step 1 - Start from the preset
Open the Laser Cut Split preset. It loads on Paris with split already enabled. Search your own city and set the zoom you like - the split grid recomputes automatically.
Step 2 - Check the split
- Open the export preview. The Tile for large format panel is already on: A1 output, 2 columns x 2 rows, giving four ~A3 tiles.
- The preview shows the tiles detached with their alignment borders, R-C labels, corner crop marks, and edge-match marks so you can dry-fit by eye.
- Change the output size or columns/rows to retarget a different bed or finished size - the shown tile size updates live.
Step 3 - Export the tiles
- Every download format tiles when split is on. Use Combined tiles (ZIP) for one cut file per tile, or Layers as tiles (ZIP) for per-tile, per-layer files.
- Each tile SVG carries real physical dimensions (297 x 420 mm), so the laser cuts at the correct scale with no rescaling.
Choose Your Build Method
Laser cutting
- Cut each of the four tile files on its own A3 sheet. The tile label (R1-C1 ...) engraves in the corner so you never lose track of placement.
- Lay the tiles out using the corner crop marks and edge-match numbers - adjacent edges share the same number.
- Glue or tape the tiles edge-to-edge onto a backing board. Because all tiles come from one source, roads and water continue cleanly across every seam.
- Optional: leave the per-tile border as a thin scored guide, or sand it off after assembly for a seamless look.
Make It Yours
- Go bigger: set the output to A0 and 2x4 tiles for a poster-scale wall map on the same A3 laser.
- Add an overlap margin if you prefer to glue lapped seams instead of butt joints.
- Turn off the per-tile border and labels for a clean cut, or keep edge-match marks only.
- Swap the backplate color or invert water-as-holes for a different material look.
Monthly Updates
New free tools, every month.
New laser cutting tools, what's coming next, and features we're building right now. Only MyLaserTools.com news. No spam, ever.
MyLaserTools
Tag us on Instagram
Share what you made with @mylasertools
Join our Facebook Group
Share creations, ask questions, get inspired
YXE Creations Craft Hub Inc
© 2026 MyLaserTools.com. All rights reserved.