Cutting accurate measuring tools with the Ruler Generator
Difficulty: easy. Time: 15-20 minutes. Best method: laser cutting with engraved markings.
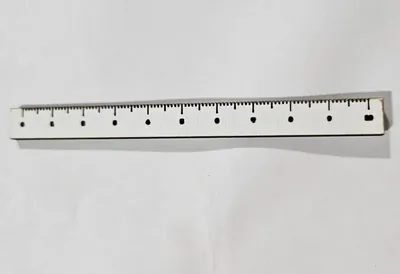
A ruler is the perfect first precision project and an endlessly useful shop tool: the laser engraves graduations far more accurately than printed school rulers, and you control every dimension. Make a 100 mm pocket rule, a 300 mm bench rule, a quilting straightedge, or branded rulers as shop merch and teacher gifts.
Because the markings are vector-engraved at machine precision, the only accuracy question is your laser's calibration, and a finished ruler doubles as a calibration check: measure the cut piece against a trusted reference and you instantly know how true your machine runs.
What You'll Need
- A laser cutter
- 3 mm laser-grade plywood for workshop rulers
- Clear or colored acrylic for see-through quilting and drafting rules
- A trusted reference ruler or calipers to verify the first cut
Step 1 - Choose units and length
Open the Ruler Generator and pick the ruler's marking unit (mm or inches), independent of your display units. Set Ruler Length to whatever the job needs; 150 mm and 300 mm are the workhorses. Use Ruler Position to shift where the scale sits on the blank.
Step 2 - Style the graduations
- Tick Mark Height controls how far graduations reach into the blank. Taller major ticks read faster at arm's length.
- Digit Size scales the numbers; keep them small enough that adjacent numbers never touch at your chosen length.
- Digit Font sets the number style. A clean sans-serif is most legible; a stencil or display font makes a great novelty gift ruler.
Step 3 - Export
Click Download SVG. The file separates the outline (cut) from ticks and digits (engrave or score) so your laser software can assign the right operation to each.
Choose Your Build Method
Cut and verify
- Engrave the ticks and digits first, then cut the outline. Score ticks as vector lines instead of raster engraving for the crispest, fastest graduations.
- Do not move the material between passes; graduation accuracy depends on both passes sharing one origin.
- Check the finished ruler against a known-good reference. If 300 mm measures 299 mm, your laser's axis calibration is off by 0.33 percent and now you know.
- On clear acrylic, engrave from the back mirrored if your software supports it, so the front face stays glassy and the markings sit against the work.
- Finish wooden rulers with a light oil; avoid thick film finishes that round over the engraved ticks.
Make It Yours
- Add your shop logo as an engraving and hand rulers out as customer freebies that never get thrown away.
- Teacher gift set: a class set of 150 mm rulers, each engraved with a student's name.
- Make a seam gauge for sewists: short ruler with bold ticks at common seam allowances.
- Clear acrylic with a fine font becomes a proper quilting ruler you can see fabric through.
- Engrave a conversion table (common fractions to mm) along the blank's free edge.
- Growth-chart ruler: scale the concept up to a 1.2 m wall board marked in centimeters.
- Pair it with the Pencil Engraving Jig and gift a matched personalized ruler-and-pencil set.
New free tools, every month.
New laser cutting tools, what's coming next, and features we're building right now. Only MyLaserTools.com news. No spam, ever.
© 2026 MyLaserTools.com. All rights reserved.