One-line portraits with the Photo Spiral Engrave Generator
Difficulty: easy. Time: 10 minutes of design, minutes of engraving. Best methods, in order: laser engraving, 3D printing. Photos stay in your browser.
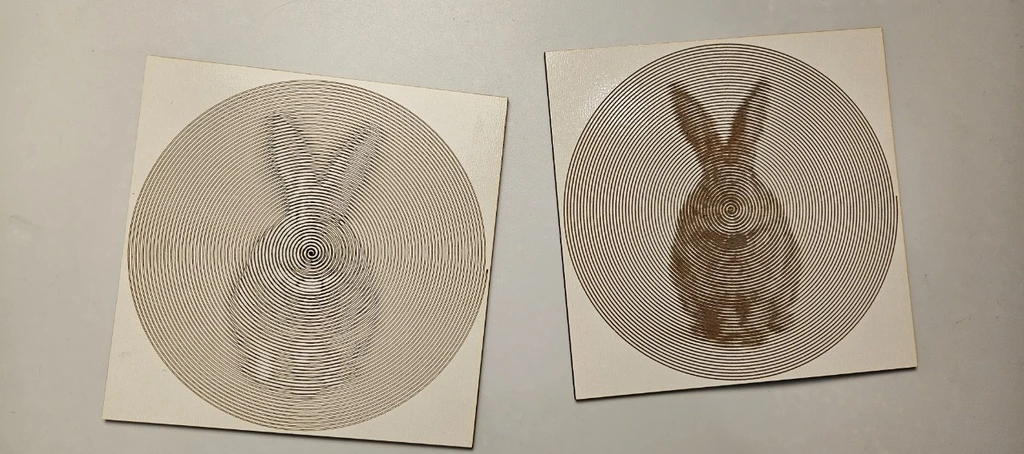
Spiral portraits are a party trick of vector math: a single line winds from the center outward, and its thickness modulates with the brightness of the photo beneath, fat through shadows, hair-thin across highlights. Up close it is an abstract spiral; at arm's length it is unmistakably the face.
Because the laser follows one continuous path instead of rastering thousands of rows, a spiral portrait engraves in a fraction of raster time. The tool runs entirely in your browser and also exports a printable relief where the spiral stands proud of a disc.
What You'll Need
- Laser engraving: laser cutter, fine-grained 3 mm laser-grade plywood or two-tone acrylic
- 3D printing: any FDM printer, one or two filament colors
Step 1 - Upload a portrait
Open the tool and upload a photo. Tight head-and-shoulders crops with strong lighting work best; the spiral has limited bandwidth, so spend it all on the face. Adjust Gamma, Brightness, and Contrast until the preview reads clearly.
Step 2 - Tune the spiral
- Diameter sets the physical size; 150 to 250 mm discs read well on a wall.
- Spiral Spacing is the gap between successive rings; tighter spacing means more resolution and longer engrave time.
- Min Line Width keeps highlight passes from vanishing; set it just above your laser's finest reliable line.
- Max Line Width caps the shadow swell; it must stay below Spiral Spacing or adjacent rings merge.
- Toggle the Units selector to design in mm or inches.
Step 3 - Export
Download the SVG for engraving, or set Base Thickness and Spiral Height and export an STL/3MF to print the spiral as raised relief on a disc.
Choose Your Build Method
Engraving the spiral
- Import the SVG; the spiral is a filled vector shape, so engrave it as a fill or, on capable machines, run it as a single heavy score for maximum speed.
- Use fine-grained material; oak-style grain fights the delicate width changes.
- Test a quarter-size version first to confirm your Min Line Width survives.
- Engrave, then cut a circle just outside the spiral for a clean disc.
- Hang with the spiral center at eye level; the image assembles as viewers step back.
Make It Yours
- Wedding-portrait spiral on a walnut disc, engraved in under ten minutes.
- Pet face spiral as a memorial ornament with a ribbon hole.
- Print a two-color spiral coaster set from four different family photos.
- Engrave on the lid of a keepsake box that holds the original photo.
- Giant version: tile a 400 mm spiral onto a tabletop slab.
- Spiral a band logo or album cover for music-room wall art.
- Pair with the Photo Halftone Generator: same portrait, two styles, hung side by side.
- Record-style gift: engrave the spiral on a 180 mm disc and frame it in a record sleeve.
New free tools, every month.
New laser cutting tools, what's coming next, and features we're building right now. Only MyLaserTools.com news. No spam, ever.
© 2026 MyLaserTools.com. All rights reserved.