Turning photos into dot art with the Photo Halftone Generator
Difficulty: easy. Time: 10 to 20 minutes of design, plus machine time. Best methods, in order: laser engraving, 3D printing. Photos stay in your browser.
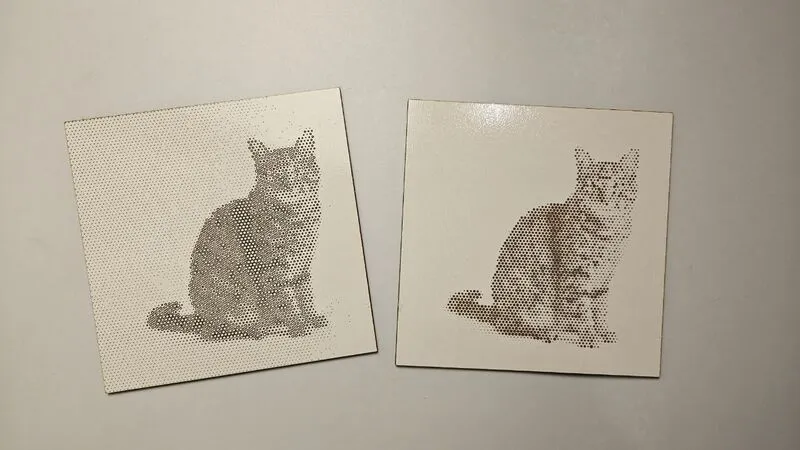
Halftone is the newspaper-photo trick: thousands of dots, each sized by how dark its patch of the image is, fuse into a portrait when you step back. This tool converts your photo into exactly that, as true vector circles rather than a dithered bitmap, so the dots cut and engrave perfectly at any scale. Everything processes locally; the photo never leaves your browser.
Engraved on wood or acrylic it reads as gallery-style pop art; printed in 3D it becomes a tactile raised-dot plaque whose image emerges from raking light.
What You'll Need
- Laser engraving: laser cutter, 3 mm laser-grade plywood, two-tone acrylic, or coated metal; standoff spacers make a slick wall mount
- 3D printing: any FDM printer, one or two filament colors
Step 1 - Upload and frame
Open the tool and upload a photo. Faces and high-contrast subjects shine in halftone; flat, low-contrast images turn to mud. Use the Gamma, Brightness, and Contrast sliders to stretch the tonal range before worrying about dots.
Step 2 - Tune the dots
- Width sets the physical size; halftones need viewing distance, so 150 mm is a practical minimum for faces.
- Dot Pitch is the spacing of the grid; smaller pitch means more dots and more detail, but mind your machine's minimum feature size.
- Max Dot Size caps how big the darkest dots grow; just over the pitch lets shadows fuse solid.
- Pattern picks the grid: Square grid is classic print, Hexagonal packs smoother gradients, Jittered breaks the mechanical feel for an organic look.
- Invert flips dark-dots-on-light to light-dots-on-dark; choose based on whether your process marks dark (wood engrave) or light (painted acrylic reveal).
- Add cut frame appends a border rectangle so the panel cuts out in the same job.
Step 3 - Export
Download the SVG for laser work, or set Base Thickness and Dot Height and download the STL/3MF for a raised-dot plaque.
Choose Your Build Method
Engraving the halftone
- Import the SVG; the dots are filled vector circles, so raster-engrave them or, on small pitches, cut them clean through for a light-through panel.
- On plywood, engrave dots dark on the bare face; on painted or two-tone acrylic, engrave through the top color with Invert chosen to match.
- Run a 30 mm test square of the densest area to dial power before committing to the panel.
- Cut the frame border last.
- Step back three metres; halftones are judged from across the room, not on the bed.
Make It Yours
- Engrave a wedding portrait halftone on a walnut panel for a fifth anniversary.
- Pop-art pet portrait on white acrylic with Invert on, mounted on standoffs.
- Cut the dots fully through thin plywood and backlight the panel with warm LEDs.
- Band-poster style: halftone a concert photo and engrave it onto a clipboard or deck.
- Print a tactile portrait plaque as a meaningful gift for a low-vision relative.
- Hexagonal pattern plus jittered comparison: run the same photo both ways and pick by eye.
- Halftone a city skyline as a long, narrow mantel piece.
- Engrave onto leatherette for a halftone photo patch.
New free tools, every month.
New laser cutting tools, what's coming next, and features we're building right now. Only MyLaserTools.com news. No spam, ever.
© 2026 MyLaserTools.com. All rights reserved.