Making a tall, narrow lake map with the Narrow Lake Map preset
Difficulty: Easy. Time: about an hour of cutting plus glue-up. Best methods, in order: laser cutting, 3D printing, UV print.
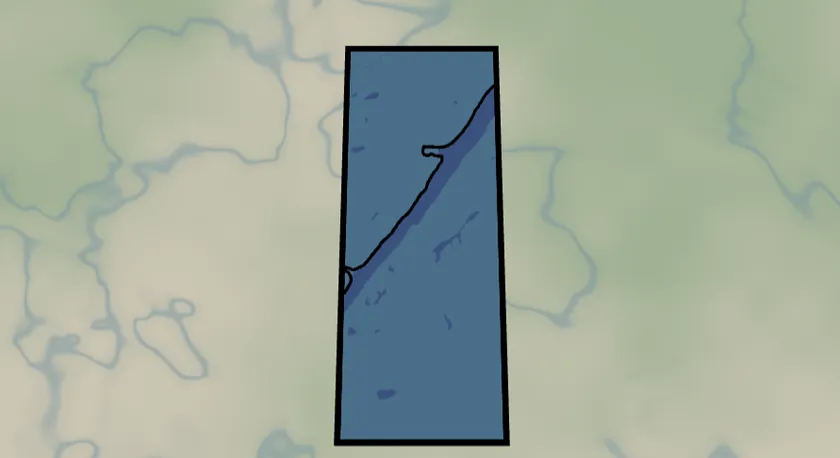
Some lakes are long and skinny, not round. A circular crop wastes them. This preset frames the lake in a tall, narrow rectangle using a custom vertical aspect ratio, so the whole shoreline fits a slim portrait plate with the water cut clean out of the land. It ships framed on Loch Ness, rotated so the loch runs straight up the plate, and works for any long lake, fjord, or reservoir.
What You'll Need
Laser cutting
- 3 mm laser-grade plywood for the land plate and one sheet for roads
- 3 mm blue acrylic (or painted ply) for the backplate - this becomes the lake color
- Laser cutter, glue, weights, masking tape
3D printing
- FDM printer, PLA in blue + a land color + black, 3MF-capable slicer
UV print / sublimation
- High-res PNG, tall rectangular blank (slate, hardboard, acrylic)
Step 1 - Start from the preset
Open the Narrow Lake Map preset. It loads on Loch Ness with a custom 2:5 aspect ratio and the map rotated so the loch points straight up the frame. Search your own lake and adjust: for a long lake, set the Overlay Shape to Rectangle, open the Aspect Ratio dropdown, choose Custom, and dial in a tall ratio (1:3, 2:5, 9:16) until the shoreline hugs the frame. Use the rotation control to line the lake up vertically.
Step 2 - Tune the layers
Three layers, top to bottom:
- Roads - Solid mode, every class from motorways (width 5) down to streets and other roads (width 2), all black. Along a remote loch the road net is sparse and graphic; toggle off
roadsOtherandroadsStreetif a town clutters the frame. - Water - Solid mode with invert as holes: the land plate, with the lake (fill
#4EA8DEin preview) subtracted. This is the piece that defines the project. - Backplate -
#2d70cdblue. Whatever material you use here is your lake, so pick something nice: blue acrylic, resin-filled, or hand-painted.
A 10-unit global border insets everything from the rectangle edge so roads don't run off the rim.
Step 3 - Export
- Laser: per-layer SVG ZIP, water inversion left on, small-polygon cleanup on (tiny islands and ponds along the shore become slivers).
- 3D printing: 3MF (multicolor) or STL.
- UV print: high-res PNG; with Background off you get a transparent PNG so a slate or wood blank shows as the land.
Choose Your Build Method
Laser cutting
- Cut the Backplate rectangle from blue acrylic.
- Cut the Water layer - the tall land plate with the lake-shaped hole. Keep islands! They'll be loose pieces; tape the sheet so you don't lose them.
- Cut or engrave the Roads layer. Solid-mode road ribbons at this scale are long and thin; engraving onto the land plate avoids handling spaghetti.
- Glue backplate → land plate (+ islands) → roads. Weight it flat. 3M tape works too: 467 or 468 for the acrylic backplate, 300LSE for harder materials.
- Sand the edges flush and finish.
Make It Yours
- Any long, narrow lake or fjord works: Loch Ness, the Finger Lakes, Lake Como's arms, Okanagan, a long reservoir.
- Pour tinted epoxy into the lake channel instead of relying on the backplate color - instant glassy water.
- Palette swap: land in walnut, lake
#0E4C66deep navy, roads off; minimalist and classy. - Push the ratio even taller (1:4) for a bookmark-shaped keepsake.
- Add a heart icon on a favorite spot along the shore before exporting.
- Make a set: the same lake at three zoom levels as a tall triptych.
New free tools, every month.
New laser cutting tools, what's coming next, and features we're building right now. Only MyLaserTools.com news. No spam, ever.
© 2026 MyLaserTools.com. All rights reserved.