Making kids' name puzzles with the Name Puzzle Generator
Difficulty: medium. Time: 15 minutes design, 30-60 minutes making. Best methods: laser-cut layered plywood, 3D printed board and letters.
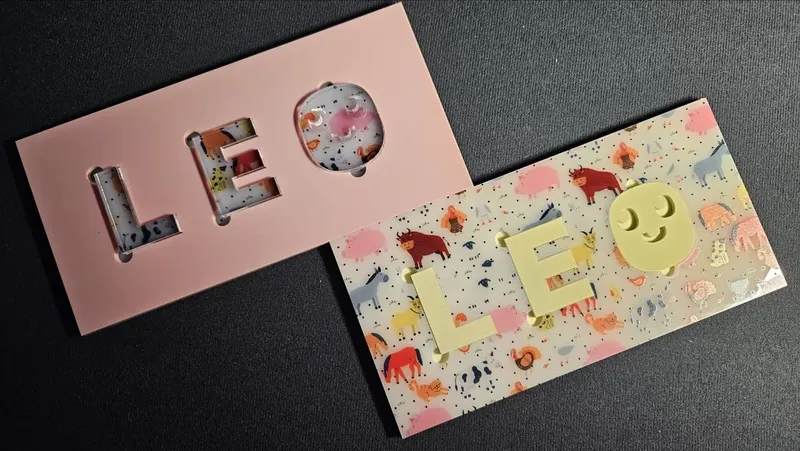
The wooden name puzzle is the reigning first-birthday gift, and the engineering is all in the fit. Type the Name, choose a bold font (the tool reminds you: bold fonts make pieces toddlers can actually grip), and it generates a frame with letter-shaped holes plus the matching letter pieces. Puzzle Width / Height size the board, Padding sets the space between letters and border, Corner Radius rounds the frame, and an optional Symbol (star, heart) fills leftover space as a bonus piece.
What You'll Need
- Laser cutting: two sheets of 3 mm laser-grade plywood for the frame and backer, plus 3-6 mm stock - or colored acrylic - for the letter pieces
- Assembly: wood glue or 3M 468 tape to laminate frame onto backer
- 3D printing: any FDM printer; bright filament colors per letter
- Safety: child-safe finish (salad-bowl oil or water-based lacquer) - this is a toy
Step 1 - Name and font
Enter the name and pick the boldest, roundest font you like - thin strokes make fragile pieces and impossible recesses. Adjust Font Size so each letter ends up at least 40 mm tall; small pieces defeat the purpose (and toddlers chew them).
Step 2 - Board layout
- Set Puzzle Width / Height to fit the name comfortably - 300 x 120 mm suits most first names.
- Padding controls the frame margin around the letters; 10-15 mm keeps the board sturdy between recesses.
- Round the frame with Corner Radius - toddler products want no sharp corners.
- Add a Symbol piece if the name leaves an empty corner.
Step 3 - Export
Download SVG (frame with letter holes + the letter pieces as separate paths) or STL/3MF for a fully printed board and pieces.
Choose Your Build Method
Laser cutting
- Cut the frame layer (letter holes) and a solid backer the same outer size, then laminate them - that is the recessed board.
- Cut the letter pieces from thicker stock or stack two cuts per letter so pieces stand proud of the board for easy grabbing.
- Laser kerf works in your favor here: pieces cut from the same file drop into their holes with a natural easy fit.
- Sand every piece edge well and break the top corners by hand.
- Finish board and letters with a child-safe oil; paint letters in alternating colors before a final clear coat.
Make It Yours
- Rainbow letters on a natural wood board is the bestseller combination.
- Engrave the birth date and weight in a corner of the board before assembly.
- Make a matching sibling set in the same font so the puzzles look like a family.
- Glue small magnets into letters and board recesses for a travel version that stays put.
- Spanish or French names with accents work - check the font carries the accented glyphs.
- Make a grandparent version: GRANDMA with a heart symbol piece.
- Pair with the Alphabet Keychain Generator to turn the outgrown puzzle font into a school-age keychain.
New free tools, every month.
New laser cutting tools, what's coming next, and features we're building right now. Only MyLaserTools.com news. No spam, ever.
© 2026 MyLaserTools.com. All rights reserved.