Printing dough and clay cutters with the Text Mold Maker
Difficulty: easy. Time: 10 minutes of design, 1 to 3 hours of printing. Method: 3D printing only.
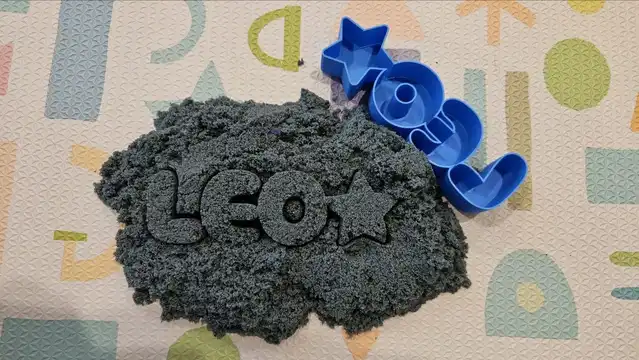
A name cutter is a cookie cutter for words: thin walls trace every letter, so one press stamps a whole name into dough or clay. This tool builds the cutter geometry for you, with letters connected into one piece, an optional outline border, and an optional symbol like a heart or star at either end.
Kids' names for play-doh, custom cookie names for parties, clay gift tags for small businesses: design takes minutes and everything exports as a print-ready STL or 3MF.
What You'll Need
- 3D printing: any FDM printer; PLA is fine for play-doh and clay, PETG is the safer pick for cookie dough since it tolerates warm washing (hand wash only, and treat printed cutters as contact-safe craft tools rather than certified food-safe items)
Step 1 - Enter the name
Open the tool and type into Name / Word, then pick a Font. Rounded, chunky faces stamp the cleanest; fine serifs clog with dough. Letter Connection chooses how letters join: Connected fuses them into one continuous cutter, Free keeps natural spacing with a connecting structure, or use both behaviours where they fit.
Step 2 - Shape the cutter
- Size By Width or Height, then set Text Width or Text Height in real units; match it to your cookie or tag blank.
- Letter Spacing and Word Spacing tune the gaps; leave enough room that walls from neighbouring letters do not merge.
- Outline Thickness controls the cutter walls; thicker survives dishwashing and enthusiastic toddlers.
- Mirror Text flips the design for stamp-style use, where the pressed result must read correctly.
- Add a Symbol (heart, star, and friends) with its own Symbol Size and Position on the left, right, or both ends.
Step 3 - Export
Check the 3D preview, then download the STL or 3MF. The cutter exports as a single solid ready for slicing.
Choose Your Build Method
Printing and using the cutter
- Slice with the cutting edge up and the flat back on the bed; no supports needed.
- Use 3 to 4 perimeters and 0.2 mm layers; the walls are mostly perimeter anyway, so infill barely matters.
- PETG for cookie cutters, any PLA for clay and play-doh.
- Dust the cutter with flour (dough) or cornstarch (clay) before each press for clean release.
- Press straight down, wiggle slightly, lift; poke stuck centers out with a toothpick.
- Hand wash promptly; printed layer lines hold residue if it dries.
Make It Yours
- A play-doh name cutter is a beloved toddler birthday gift; add a star symbol on each side.
- Batch name cookies for a classroom party from one cutter per child.
- Clay gift tags: stamp customer names into air-dry clay, pierce a hole, and bake-free gift tags are done.
- Mirror Text plus shallow pressing turns the cutter into an embossing stamp for fondant.
- Make a SOLD cutter for realtor closing-day cookies.
- Cutter sets of holiday words: NOEL, JOY, BOO, depending on the season.
- Kinetic sand name molds keep restaurant waits peaceful.
- Stamp a maker mark word like HANDMADE into the back of your polymer clay pieces.
New free tools, every month.
New laser cutting tools, what's coming next, and features we're building right now. Only MyLaserTools.com news. No spam, ever.
© 2026 MyLaserTools.com. All rights reserved.