Making layered ball ornaments with the Christmas Ornament Generator
Difficulty: easy. Time: 10 minutes design, 15-30 minutes per ornament with assembly. Best method: layered laser-cut plywood and acrylic.
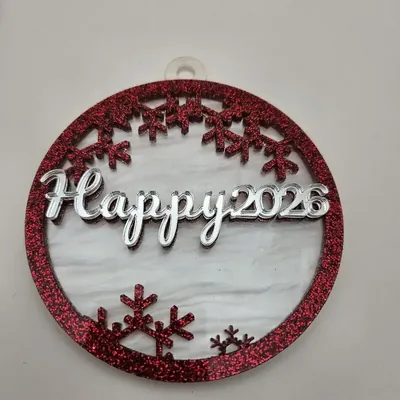
The classic personalized ball ornament, engineered in layers. Type the name in Ornament Text and pick a Design Type: Single Layer is one cut-through piece, Two Layer adds a solid Backplate behind a Front with Snowflakes, and Three Layer sandwiches a separate Text Layer between a backplate and a snowflake Frame for real depth. Ornament Size sets the ball diameter, Border Thickness controls the rim weight, and the hanger loop is built into the ball outline.
What You'll Need
- Laser cutting: 3 mm laser-grade plywood plus festive acrylic - glitter red, frosted white, and mirror gold were made for this
- Assembly: 3M 467/468 tape or CA glue for layer bonding
- Finishing: ribbon or ornament hooks
Step 1 - Name and design type
Enter the name and pick the layer count. Two-layer is the production sweet spot: a glitter backplate flashing through the snowflake cutouts looks premium and assembles in seconds. Three-layer earns its extra glue time on mantel-piece ornaments. Choose a connected script font so the name stays in one piece.
Step 2 - Size and rim
- Ornament Size of 80-100 mm reads well on a full-size tree; 60 mm suits tabletop trees.
- Border Thickness of 3-5 mm keeps the snowflake cutouts from weakening the ball.
- Long names shrink to fit - nicknames often look better than formal names at ornament scale.
Step 3 - Export the SVG
Download the SVG - each layer (Ornament, Backplate, Text Layer, Frame) exports as its own path, ready to assign to different sheets and colors.
Choose Your Build Method
Laser cutting
- Cut each layer from its own material - classic combo: glitter acrylic backplate, plywood or white acrylic front.
- Stack and check alignment dry; the hanger loops should overlap perfectly.
- Bond with 3M tape (cleanest on acrylic) or tiny dots of CA glue away from the cutouts.
- Thread ribbon through the hanger loop.
- Batch production trick: cut all backplates from one sheet, all fronts from another, and assemble in an assembly line.
Make It Yours
- One ornament per family member in the same design, names changed - instant tree tradition.
- Baby's First Christmas with the year as the text and frosted white acrylic.
- Mirror gold backplate behind walnut plywood for the heirloom look.
- Glow-in-the-dark acrylic backplate for kids' rooms in December.
- Make matching gift toppers at 60 mm - they migrate from the present to the tree.
- Sell sets of four at markets: red, green, gold, silver backplates, buyer picks names.
- Pair with the Stocking Tag Generator so the stocking and the ornament match.
New free tools, every month.
New laser cutting tools, what's coming next, and features we're building right now. Only MyLaserTools.com news. No spam, ever.
© 2026 MyLaserTools.com. All rights reserved.